In this room I used pallet wood on the ceiling. There used to be a closet on each end, I tore one of them out which left a whole in the drywall on the ceiling. The popcorn texture is impossible to recreate, so I had to remove it. I am planning to go back one room at a time and remove it throughout the house, but I thought this would be a good place to start. It actually wasn't that hard. I used a gardening pressure sprayer (just a cheap one) to spray the ceiling with water. Let it set for a few minutes, then use. Drywall knife to scrape the texture off. If it's wet enough it comes right off. It does require some prep work - hang plastic from the walls down and on the floor because it's a nightmare to clean up! My fiance, David, helped me cut the pallets apart with a reciprocating saw and metal cutting blade. I just left the nail heads in the boards. I stained them a weathered oak color mixed with provincial. I didn't sand the boards at all, I wanted them to he very rough looking. With a finishing nail gun I nailed the boards up just directly to the drywall. The pallet boards were light enough that they did not require any strips of wood to attach to between the rafters. I did not plan out the boards before putting them up. I just measured what length I needed and cut them to fit one board at a time. U found some 3/4 inch long boards in the barn that I ripped down to 2 1/5 inches with the table saw and stained to use for trim. David helped me cut out what we needed to for the light fixture and the new fixture screwed right to the pallet board. I painted the paneling in a light grey satin finish and the trim in gloss finish snow white. All of the signs I did myself on wood that I found in the barn. I'm pretty proud of this room, I did it mostly by myself. Including the cabinet for the laundry baskets. It was my first build! No doors or sides, just a frame and shelves. Painted and distressed with plywood top. The French doors I found at an antique store. They are exactly the right height and fit together to cover the water heater. U used mod podge to glue scrap book paper over the widows so you can't see the water heater back there.
Monday, August 29, 2016
Monday, June 6, 2016
Breakfast Bar
Tuesday, April 26, 2016
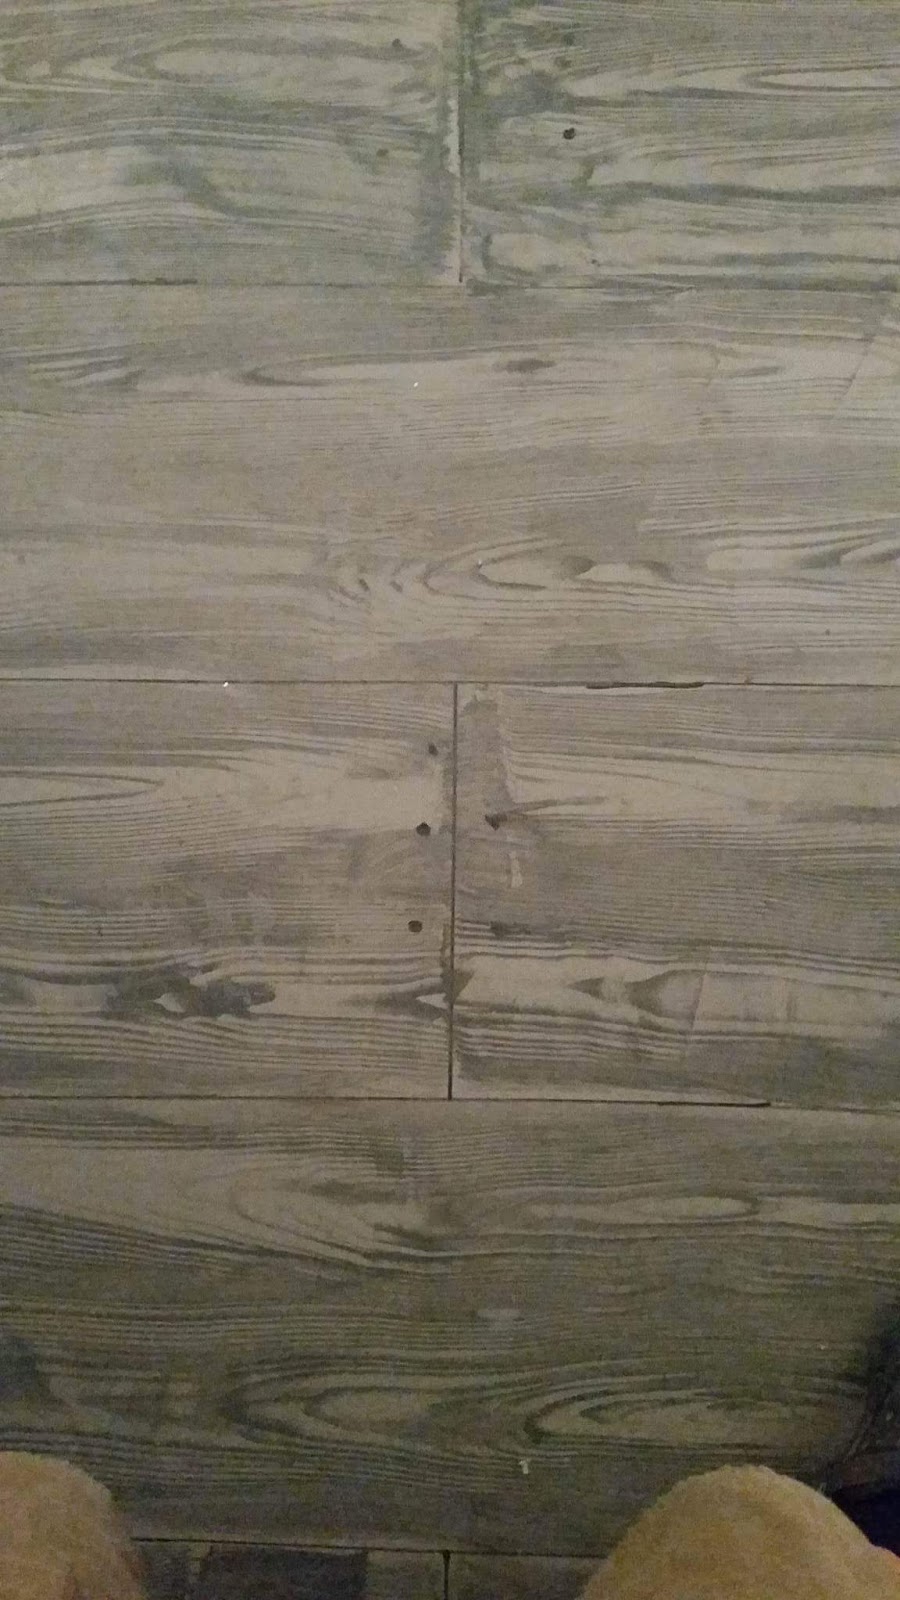
More wood grain stained concrete!
Weathered grey wide plank wood floor? Look again - it is STAINED CONCRETE! after the feather finish I used the same base color stain. Valspar semi transparent concrete stain, driftwood is the color. Then I measured out my planks and used a straight edge and oil based paint pen to draw the lines. They are 10 inches wide and 10 feet long. I offset every other one by 10 inches. Then I used the same paint pen to draw circles at the ends of the planks for nail heads. I used a much darker color grey of the same stain and mixed it with clear mixing glaze and added in a little bit of minwax wood stain in ebony to darken it up and a little bit of concrete stain in vaquero to make it a bit warmer. I brushed it on one plank at a time and I used a graining tool to pull the mix and give it a grain effect.
Lesson learned the hard way: write down your mix proportions when you get it how you want it the first time because as much as you believe that you will remember - you may not remember..... then it's trial and error to get it the right consistency and shade again.
Retiring the Recessed Florescent Light
![]() |
| finished kitchen recessed light |
Friday, April 8, 2016
A bathroom for the Princesses
I used Valspar oil based porch and floor paint on the floor and a stencil with oil based high gloss bright white, then DuraSheen gloss floor sealer. I absolutely love the stencils from Royal Design Studio. Their stencils are so durable and beautiful. The oil based floor paint soaked into the concrete beautifully. This is the first time I had used it on concrete and I couldn't be happier with the results.
I trimmed out the tub enclosure with some narrow window trim and attached it using pre-drilled holes and tub and tile caulk. **My first solo trim job! Took me a little longer than I anticipated, but I got it! The outside wall of the enclosure where the trim is attached is practically impossible to nail through and since the tub has a curved shape I had to use more than just adhesive caulk.
The shelves are original - I thought the polyurethane wood gave the room a more rustic look.
Tuesday, March 22, 2016
Rustic Chic Master Bath

Wednesday, March 9, 2016
Wood Grain Stained Concrete!
![]() |
| Yep! Stained Concrete! |
So, here is the feather finish (left) and with the base coat (right). Pardon the toilet hole... not sure of the technical term to use, but that's the nicest thing I can come up with (blah!). I used Valspar semi-transparent concrete stain in driftwood, which is what I used in the rest of the house. I just rolled it on with a paint roller.
I used Valspar semi-transparent concrete stain in ember for the darker grain top coat. I is kind of a dark cool gray with a hint of deep blue - I love this color! I picked up a graining tool from Lowes. It is a funny looking little piece of magic! I have no idea how this thing makes wood grain, but it is awesome.
* Important tip - use Valspar mixing glaze to thicken the stain. I used an entire jar which is about 1 pint of glaze with about 1 1/2 cups of stain. I love mixing glaze because you can mix it with any paint to make it more workable for faux finishes.
You work in small areas, 2-3 feet at a time. Spread a thin layer of glaze/stain mix then drag the tool from one end to the other rocking it slowly from back to front to back. You can add variation to this of coarse, to get the desired look. The glaze allows some working time, so if you don't like that pass, just use your brush and spread it back out and try again.